Exploring Islands Architecture, DIY implementation
A pattern that balances performance, interactivity, and SEO... explore how it works under the hood.

You may have heard the term "Islands Architecture" being use online, usually it's most commonly associated with frameworks like Astro or Fresh.
Because of this, to some extent it could look like these frameworks are doing magic behind the scenes. That's why the main goal of this article is to demonstrate how to implement this pattern, and hopefully give you a better idea of how these types of optimizations work, as they can be achieved on most website with just a little bit of JavaScript.
The islands architecture
First of all, what is the islands architecture?
The overall main idea of this pattern is to inject the absolute minimum amount of Javascript possible, while having a good balance between interactivity, performance, and SEO, the latter is usually achieved via either Server Side Rendering (SSR) or Static Site Generation (SSG) also known as pre-rendering.
Since this is a component-based architecture, we can separate the static (non-interactive) components from the ones that need some client-side JavaScript to work.
At which point, we only hydrate (load JS for) specific components that provide some kind of user interactivity, while the other static regions of the page stay as pure non-interactive HTML that do not require hydration.
Let's imagine a website that looks like the following:
I'm sure you noticed, most of the user interface is pretty much made of non-interactive elements that can be rendered during a request to the server or build time. In this example, only a few components need JavaScript to execute some kind of client site code. This is often the case when it comes to content driven websites like marketing sites, blogs, and e-commerce.
To some degree, this architecture promotes using Web standards by taking advantage of native browser features, rather than reinventing the wheel for things the browser and servers already know how to do. That's the case for most single-page-applications as they often make use of a client site routing, caching, form handling/validation, and similar libraries that quickly add up slowing down and complicating things over time.
Fortunately most websites dont really need to deal with that type of complexity...
Now, let's explore how to build a custom islands implementation.
Technologies
Let's break down the technologies we'll actually be using for this exercise:
Vite
The Build Tool for the Web
Simply put, Vite is one of the best JavaScript build tools available. It's really fast, easy to use, and UI agnostic, meaning it can bundle various frontend frameworks, Preact being one of them.
Preact
Fast 3kB alternative to React with the same modern API
When it comes to islands architecture, Preact is my UI framework of choice. Its main selling points are:
- Familiar React-like API with support for JSX, Hooks, function components, Context, and even Suspense.
- Overall better performance and a hilariously smaller in bundle size.
Here is a quick comparison:
- react + react-dom + react-router-dom = 70.8kB minified and gzipped
- preact + preact-iso = 6.7kB minified and gzipped
That is 64.1kB - a huge 165% difference!! so let's remember with islands we are looking to inject the minimum amount of Javascript possible, using Preact sounds like the more reasonable approach.
Web components
A web standard for creating reusable UI elements
Well, kind of 😃... they turned out to be a very niche standard, but to be fair, I think they got some really interesting use cases like in this specific situation.
We’ll create a custom element that will work as a wrapper for specific Preact components and will enable them to be hydrated independently. As a plus, we could pass attributes to specify when hydration should happen, for example when visible or when a given media query matches.
The implementation
TLDR; Here's a demo put together with the steps blow: github.com/fveracoechea/preact-islands-demo
Enough talk, let's start writing some code...
Scaffolding
First, let's generate a Vite + Preact project by running pnpm craate preact or
npm init preact, as well make sure to select the following options so that
both router and pre-rendering are enabled:
- Project language: TypeScript
- Use router?: Yes
- Prerender app (SSG)? Yes
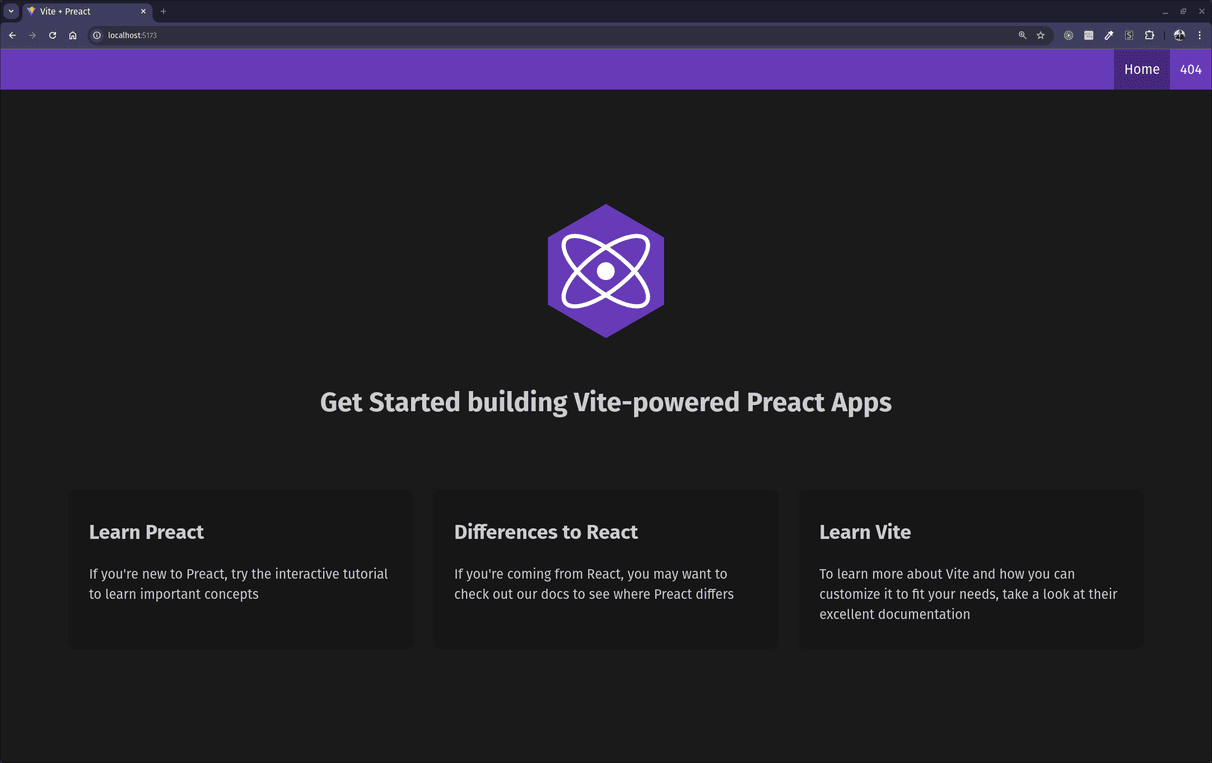
After running npm run dev or pnpm dev you should see the following:

Utility functions
At this point, we want to allow for components to be rendered on the server as placeholders and then hydrated into interactive elements on the client. Two key functions make this happen:
// src/lib/preact-islands.tsx
import type { FunctionalComponent, JSX } from "preact";
import hydrate from "preact-iso/hydrate";

export type IslandsConfig = Record<
  string,
  () => Promise<{ default: FunctionalComponent }>
>;

export function registerIslands<C extends IslandsConfig>(config: C) {
  customElements.define(
    "preact-island",
    class extends HTMLElement {
      async connectedCallback() {
        const src = this.getAttribute("src");

        if (!Object.prototype.hasOwnProperty.call(config, src))
          throw new Error(`${src} is not a registered island`);

        const load = config[src];
        const Component = await load();
        hydrate(<Component.default />, this);
      }
    },
  );
}

export function withIsland<S, Props = {}>(
  Component: FunctionalComponent<Props>,
  displayName: string,
): FunctionalComponent<Props> {
  return (props: Props) => {
    if (typeof document !== "undefined") return <Component {...props} />;
    return (
      <preact-island src={displayName}>
        <Component {...props} />
      </preact-island>
    );
  };
}
Here is a quick breakdown:
registerIslands()
It's where most of the magic happens, basically this function registers a
preact-island custom element that tells the browser to lazy-load the
corresponding component's code (via connectedCallback), then hydrates it,
making it interactive.
withIsland()
A very simple higher-order component that marks a given Preact component as an "island."
When running in the browser, it does during hydration, so it renders the
Component directly using any provided props. But when running on the server, it
renders the Component wrapped by a custom <preact-island> HTML tag with a
src attribute pointing to the name of the island.
It is important to notice that displayName should match one of the keys in
the config object passed to registerIslands().
Writing a simple island
Let's start by building a simple button as our first island component. This
simple button will trigger a window.alert when clicked:
// src/islands/Button.tsx
import { withIsland } from "../lib/preact-islands";

function Button() {
  return (
    <button
      style={{ width: 300, fontSize: 16 }}
      onClick={() => alert("Interactivity Yeah!!")}
    >
      <span>Button Island - Click me!</span>
    </button>
  );
}

export default withIsland(Button, "Button");
Notice that the component is wrapped with withIsland(), which requires the
component itself and a displayName as arguments. The displayName is used to
identify the component during hydration.
Loading islads
Finally! The last piece of the puzzle! it is basically configuring Vite to
ensure only the necessary "islands" are sent to the browser, rather than the
entire app. Luckily this can be easily done using the dynamic import()
function, follow the next steps:
Move app component
First, copy/paste the main App component into a separate file:
// src/App.tsx
import { LocationProvider, Route, Router } from "preact-iso/router";

import { Header } from "./components/Header.jsx";
import { Home } from "./pages/Home/index.jsx";
import { NotFound } from "./pages/_404.jsx";

export function App() {
  return (
    <LocationProvider>
      <Header />
      <main>
        <Router>
          <Route path="/" component={Home} />
          <Route default component={NotFound} />
        </Router>
      </main>
    </LocationProvider>
  );
}
Add code splitting
Now, modify the src/index.tsx entrypoint to handle different behaviors for
development and production:
// src/index.tsx
import hydrate from "preact-iso/hydrate";
import render from "preact-iso/prerender";

import { registerIslands } from "./lib/preact-islands";
import "./style.css";

// the dev server (dev command) runs in development mode
const isDEV = import.meta.env.MODE === "development";
const isBrowser = typeof window !== "undefined";

if (isBrowser && isDEV) {
  // Hydrate the whole app while in development
  import("./App").then(({ App }) => {
    hydrate(<App />, document.getElementById("app"));
  });
}

if (isBrowser && !isDEV) {
  // Only hydrate Islands in production
  registerIslands({
    Button: () => import("./islands/Button"),
  });
}

export async function prerender(data) {
  const { App } = await import("./App");
  return await render(<App {...data} />);
}
Please make sure you notice the following:
- In development, the entire app is hydrated to simplify debugging.
- In production, only the defined islands are hydrated using the
registerIslands()function. - Button key in the
registerIslands()configuration matches thedisplayNamearg provided towithIsland(). This link is really important for identifying and loading the correct island dynamically.
Render it on the page!
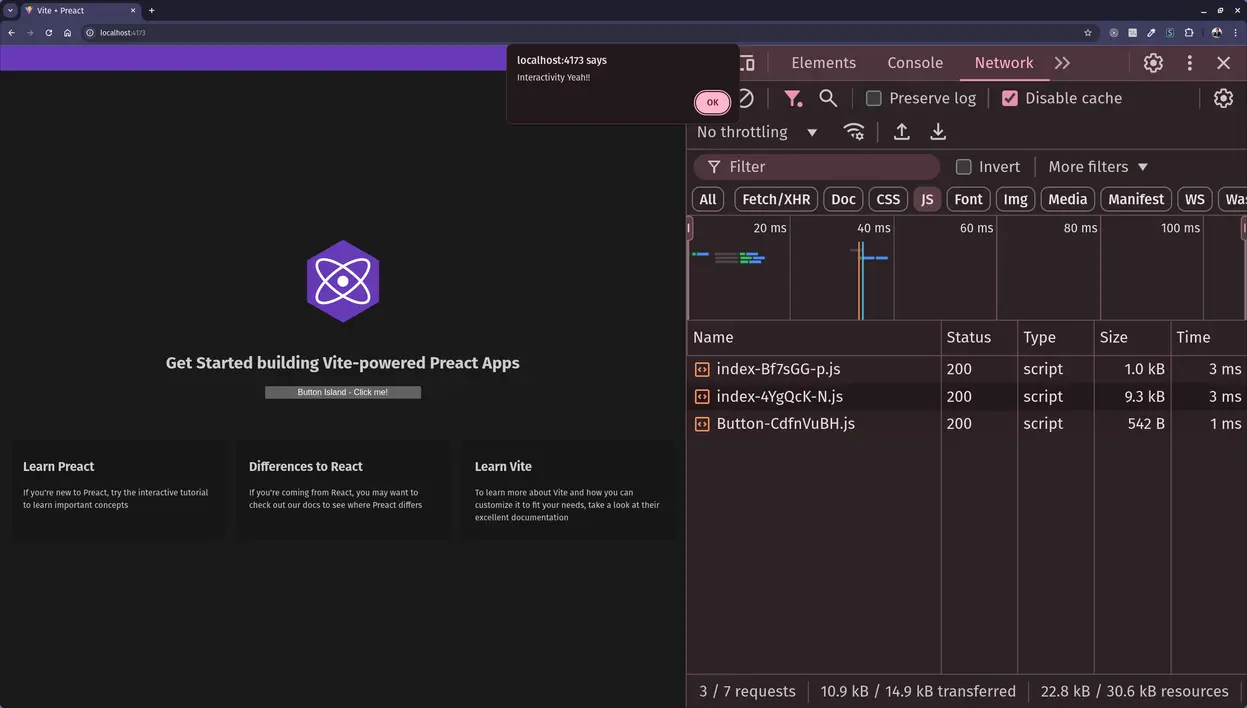
At this point, we should be able to render our button island anywhere on the page, so let's do that and run:
npm run build && npm run preview
This is what you would get on localhost:4173:

Not so fast, there are a couple more thigs I'd like to mention...
I'd suggest adding the following snippet to your global CSS styles:
preact-island {
  display: contents;
}
It should help preventing styling issues if any, by making it so that the custom element is not perceived as a box by the browser, and instead is replaced by its child.
Also if you are using TypeScript and I hope you are... add the following snippet
somewhere in the code, it would make TypeScript recognize preact-island as a
usable html tag:
declare module "preact/jsx-runtime" {
  namespace JSX {
    interface IntrinsicElements {
      "preact-island": JSX.HTMLAttributes<HTMLElement>;
    }
  }
}
Final thoughts
All in all, this is just one of many ways to implement this pattern. The main goal is to use UI components to generate a static HTML skeleton of the page and then add interactivity as needed. When working with different technologies, I believe it's just a matter of adapting to the build tools and server setup being used. This approach can most likely be applied to custom server-side rendering or most static site generators. For the latter, I recommend checking out Lume and Eleventy.
Personally, I find it to be a solid solution, especially for performance-sensitive websites that should be lightweight and focused on displaying content to users as quickly as possible.
As a plus, it also enables Progressive Enhancement, which is the idea that your page work with HTML first, allowing everyone to access the basic content and functionality as a baseline, and then enhancing the user experience for those with advanced browser features or faster internet access.
All that being said, should You roll out your custom islands to production?
Probably not. I'd say it's safer to go for a framework like Astro or Fresh, as they offer documentation and more features that can be useful over time. However, I still think it may be ok if we're talking about a more personal site.
Thanks for reading this article! I really hope it sparks some new ideas and encourages you to try your own DIY implementation of this pattern.
Demo repo: github.com/fveracoechea/preact-islands-demo
Resources
Here are a couple resources, in case you'd like to dig more in to this subject: